


Download this sewing pattern here
Prepare the pattern
Once you’ve decided on the size, buy the pattern and download it from the link provided after purchase.

Print the downloaded file at the print size indicated (A4 or A3).
Please note that we cannot offer refunds for orders placed in the wrong print size.

Cut out the pattern along the cutting lines (---CUT---). Cut out the triangular parts (notches) carefully as well.


- 【 notch 】
- A mark used to align fabric pieces when layering them together.
Apply interfacing to the fabric
This time we apply 5 mm-thick urethane foam to the fabric. This step isn’t required, but we recommend it because it gives a more polished result.
Using a fabric glue such as “Saiho Jozu” can soak through to the right side of the fabric and make it stiff, so we recommend bonding with spray adhesive instead.
After spraying the adhesive, if possible place a weight on top of the fabric to press it together.


Cut out the fabric
Place Outer A–E on the fabric you applied urethane foam to. Position them so the nap direction of the fabric lines up with the “grainline (arrow)” on the pattern, then cut.


If the pattern says “×2,” cut 2 of the same piece.
If it says “×1,” cut just 1.


If a piece is marked “(one left, one right),” flip the pattern over and cut.
※The image shows the “Structured Cap (Type A).”


Cut out the triangular parts (notches) of the pattern carefully as well.

Once you’ve cut the required number of each piece, cut out the lining the same way.

Lining A and B are the same shape, so you can layer and cut them together.
The placement marks for the pieces (shown as dotted lines) differ between them.
※The image shows the “Structured Cap (Type A).”


Sew the outer
Layer the Outer A pieces with right sides together, clip them, and sew along the clipped section.

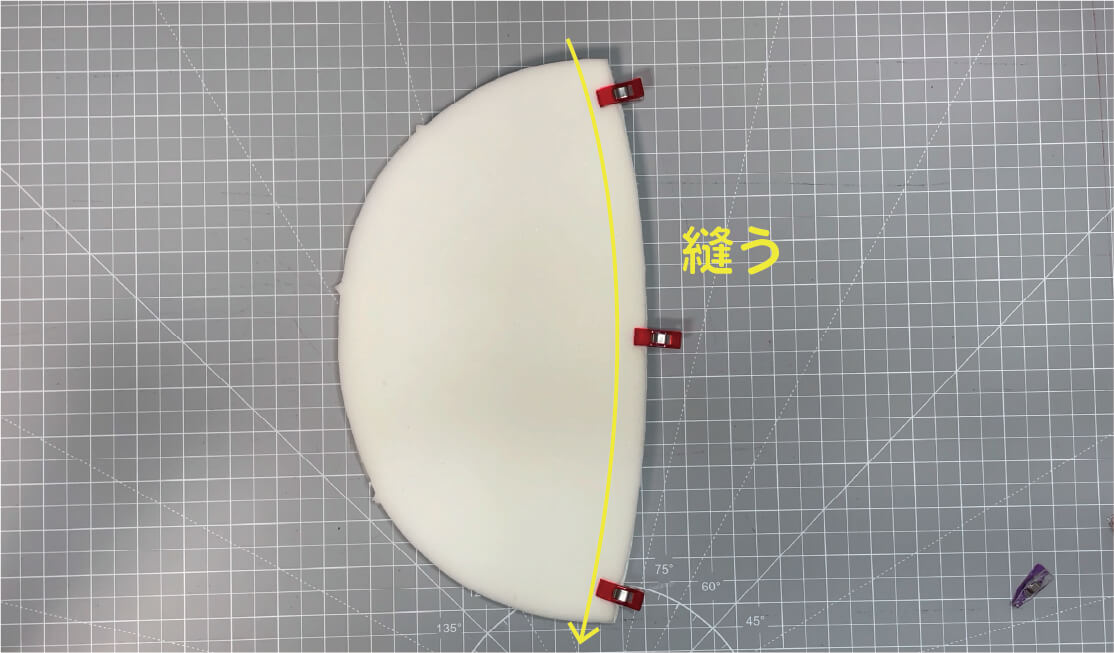

- 【 right sides together 】
- Layering two pieces of fabric with their right sides facing each other.
Place Outer B and C right sides together, clip them, and sew the three sides to form a loop.


Layer Outer A with Outer B and C as shown in the image, and sew all the way around the cap.
If the triangular notches don’t line up, you may have the front and back of Outer A reversed, so check the orientation.

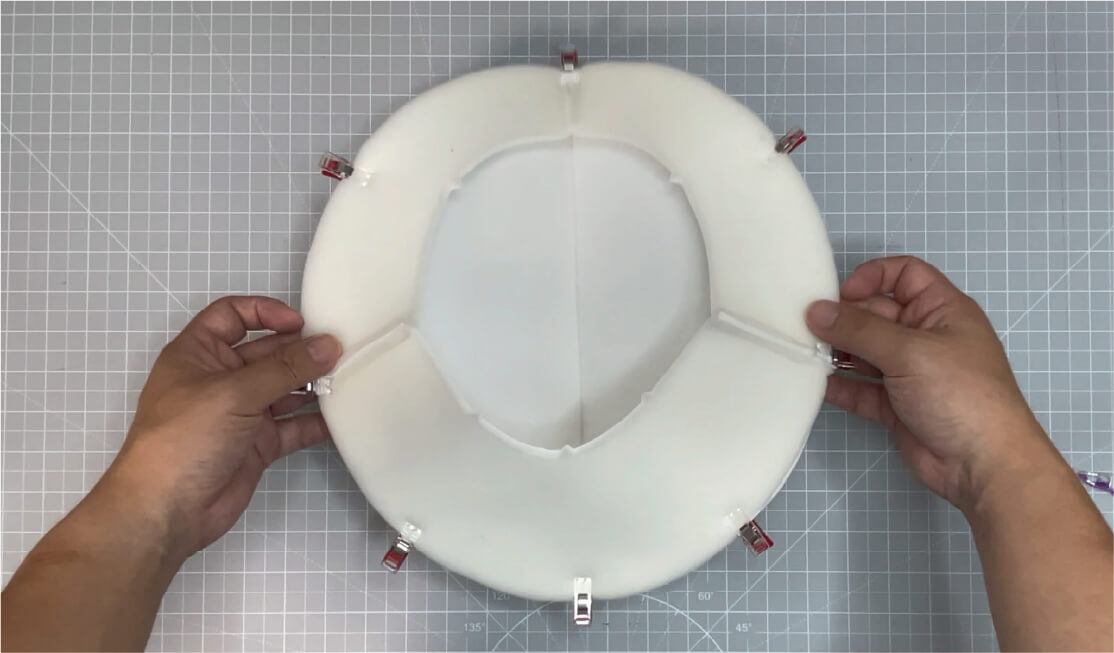

Fold Outer D in half and sew along the yellow line.
※In the how-to video a gold ornament is sewn on, but we’ve omitted it in this explanation.


Layer Outer A, B, C with Outer D as shown in the image, and sew all the way around.


Layer the Outer E pieces with right sides together, clip them, and sew along the clipped section.


Once the edges are sewn, turn it right side out and sew 2–3 mm from the edge of the opening.


Layer Outer A, B, C, D with Outer E as shown in the image, and sew 2–3 mm from the edge to baste them in place.
The outer is now complete.


Sew the lining
Cut out the inside of the dotted line on Lining A with scissors.


Once cut, layer it onto the “right side” of the fabric and trace the inside of the frame with a fabric marker to mark it.


Mark Lining B the same way. Mark this on the “right side” of the fabric as well.


Draw lines on Lining C just like on the pattern. (All line widths are 7 mm.)
This time, mark on the “wrong side” of the fabric.


Once the lines are drawn, fold back the top and bottom seam allowances of Lining C and place it onto Lining A as shown in the image.
Position it so the “right side of the frame” you drew on Lining A lines up with the left line of Lining C.
Once placed, sew along the yellow line in the image.


Make a double-fold hem on the right side of Lining C and topstitch it.


Layer Lining D with right sides together and sew a U-shape around it.


Once you’ve sewn the U-shape, trim the corners with scissors and turn it right side out to complete the belt.


Get a 25 mm-wide hook-and-loop fastener, cut it to 6 cm long, then round off the corners with scissors.
It’s fine to use it as is without trimming the corners.


Next, cut a 15–20 mm-wide flat elastic to 11 cm long.


Insert a pin 5 cm from the end of the belt, then feed the flat elastic in from the hole on the opposite side. Push the elastic all the way in to the pin.
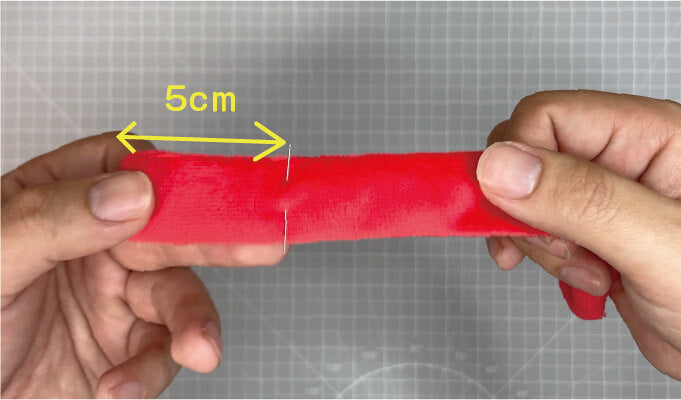


Once you’ve pinned the elastic so it won’t slip out, position the fastener aligned with the left of the belt.
If the elastic is pushed all the way in, the elastic and the fastener will overlap as shown in the image.


Sew all the way around the fastener.
For the fastener on the belt, use the “rough, prickly side” (hook side).


Once sewn, pull the elastic out with tweezers or similar and sew it together with the end of the belt. The “size-adjustment belt” is now complete.


Once the size-adjustment belt is complete, position it on Lining A as shown in the image and sew along the yellow line.


Fold the belt back the other way and sew 5 mm from the end of the belt (along the yellow line).


Fold Lining C back the other way and sew 5 mm from the top and bottom edges (along the yellow line).
Lining A is now complete.


Place the fastener at the marked position on Lining B and sew it on.
Use the soft side (loop side) of the fastener here.


Fold Lining A and B in half with right sides together, and sew the inner curve (along the yellow line).


Layer Lining A and B with right sides together and clip them in place to baste. Finally, mark the stop-stitching point for the opening you’ll use to add the stuffing, and don’t sew this section.


- 【 stop-stitching point 】
- Sewing up to the marked line.
Sew everything except the stop-stitching point, and the lining is complete.


Sew the outer and lining together
Place the outer and lining right sides together and sew all the way around.


Turn the whole thing right side out through the opening in the lining.


Sew 5 mm from the edge around the brim, except for the “visor” of the cap.


Add the stuffing
Add stuffing through the opening in the lining.
Stuff only around the edges of the cap, and try to keep as little stuffing as possible at the crown.


Close the lining opening
Finally, close the opening in the lining.
Fold the fabric around the opening back by 7 mm and sew it together.


Your “Structured Cap (Type B)” is complete! Add an emblem or other details if you like for an even more polished finish!

